How to use 9-Slicing in UMG
9-slicing as a standard technique to scale a background image dynamically to its content, while keeping scaling artifacts to a minimum. Unreal UMG supports nine slicing, but unfortunately, like so many things in Unreal, it is neither well documented nor intuitively to use. So lets digg into it:
What is 9-Slicing?
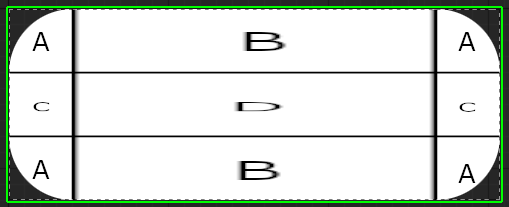
The Wikipedia page on 9-Slicing gives a good overview. 9-Slicing works by slicing an image into 9 distinct areas, 3 columns and 3 rows, which will only scale in defined directions when the image is non uniformly scaled.

A: the corner areas will remain untouched by the scale change, those are the anchors, their height and width will not change
B: the top and bottom middle areas will only be scaled horizontally, their height will not change
C: the left and right middle areas will only be scaled vertically, their width will not change
D: the central area will be scaled both horizontally and vertically, both width and height will change
How does it work in UMG
First we need to look at the brush settings on an Image widget.
The "Draw As" setting will be set to "Image" by default, which means any scaling to the widget will scale the image uniformly
Uniform scaling when set to "Image"
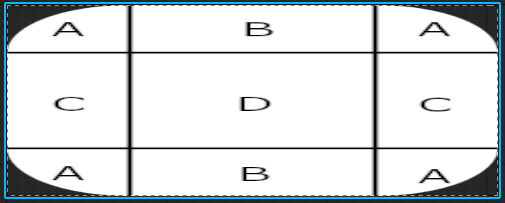
There are to "Draw As" types that 9-Slice, Box and Border. They use the same settings, but produce a slightly different result. I will focus on the Box mode here, but everything I write works the same for the Border mode.
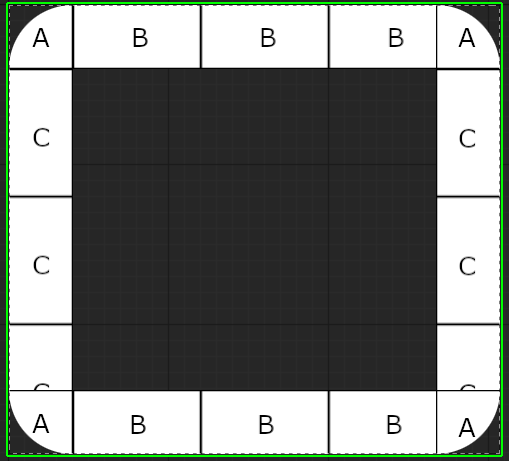
Left: Box, Standard slicing Right: Border, it takes the 9 slicing into account, but instead of scaling the borders it tiles them and removes the center area
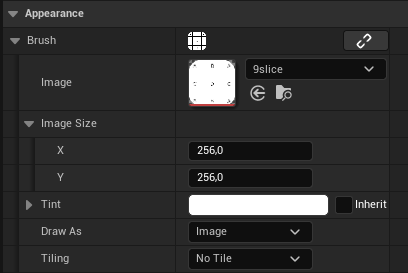
After switching to Box mode you will see a new setting appear, Margin. This setting defines how the image is sliced and works closely together with the image size.
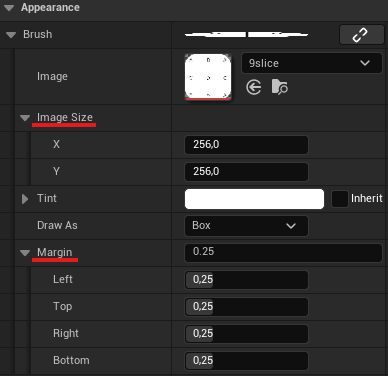
Margin is a relative setting, so if you want the slices to be at specific pixel values on you texture you will need to convert that value to relative "image size space".
In the example of my little test texture above, my image has a size on 256x256 pixels. My slices should conveniently happen at 64 pixels from the texture border.
64/256 = 0.25
That means if I set all my margins to 0.25 it will get a correctly 9-sliced result.
Minimum image size
Now that we have the 9-Slicing setup we can scale the image up and it will scale accordingly and not distort in unwanted ways. But we still have one thing we need to be careful about. If we scale the image down to much we will still get distortions.

The minimum size the image can have before it distorts, is again defined by the margins and the image.
The minimum height for my example is 128. The image has a full height of 256 and both the Bottom and Top margin are .25
256*0.25 + 256*0.25 = 128
Change the border thickness
Now you might think that you can make the borders ticker or thinner by simply changing the image size and you can, but it needs additional work.
If you use a texture as brush source, like I did, in my examples, then you are locked into the image size, no matter how you change the image size, it will always take the size set in the source file.
But if you wrap the same image in a material you are no longer restricted by the source size of your image.
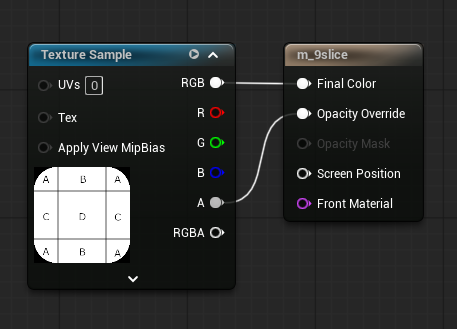
Like this unreal can no longer simply read the image size from the texture to determine how thick the borders should be. It now needs to fall back to the setting in the brush, thus allowing you to influence the border thickness without much hassle.
PSA: Unreal 5.7
It seems like the preview in the viewport is not updating anymore when you change the image size in the brush on Unreal 5.7. I needed to unasign and reselect the material for it to update correctly.
Examples
Combining UV Spaces
I like to combine multiple layers into one using materials, I wrote about that topic here, this is one application of that principle.
Unreal exposes multiple UV spaces to the material, which can be very useful for combining multiple layers into one.
The GetUserInterfaceUV node exposes the Normalized UV and the 9-Slice UV.
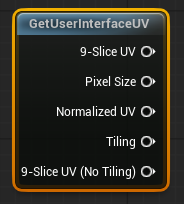

1. Node 2. Normalized UV 3. 9-Sliced UV with thin borders and high margin for better visualization
One way to combine them is using the 9-Sliced UV for the background image and the normalized UV for an icon that should never stretch.
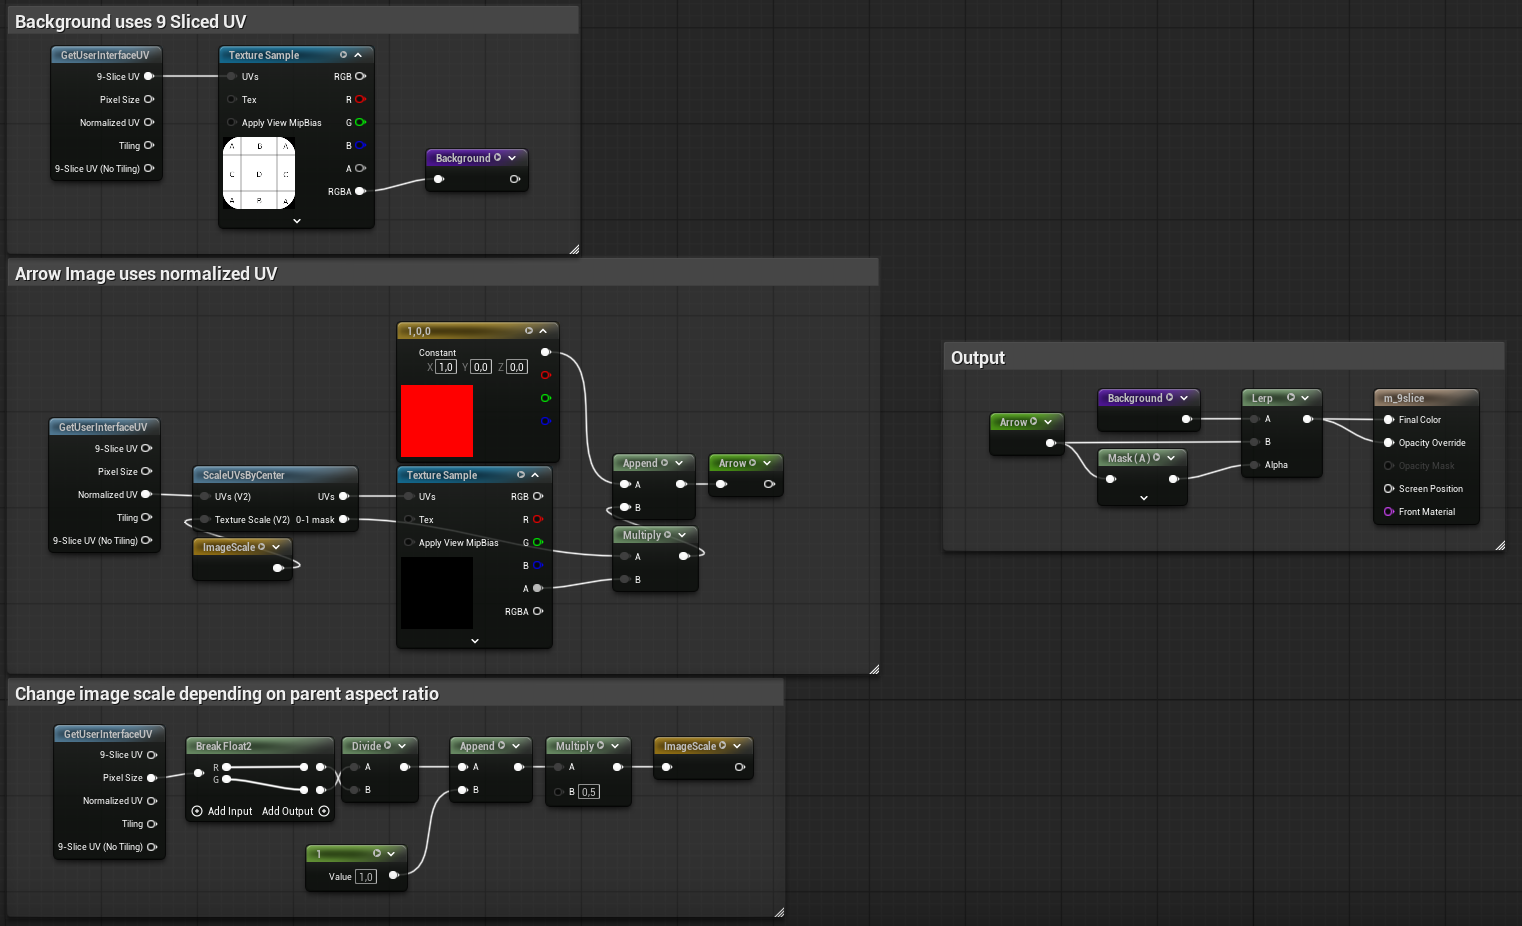
Turn a circle into a rounded box
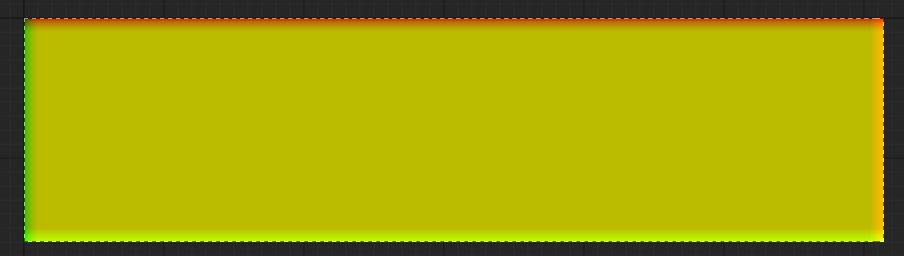
By setting the Margin to 0.5 you can basically force the 9-Slice to turn into a 4-Slice, where instead of stretching the central area of an image, it stretches a single pixel at the edge of the slice. This will cause artifacts if the image you want to 9-Slice has an actual structure, but it works great if the image is just a single color, or if you just want to use it as a mask.
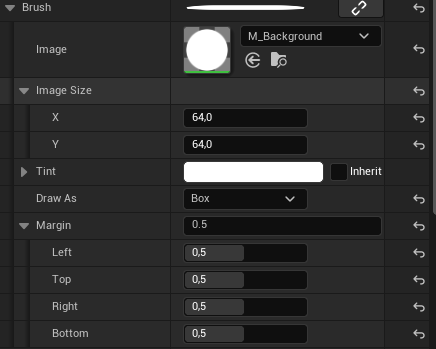
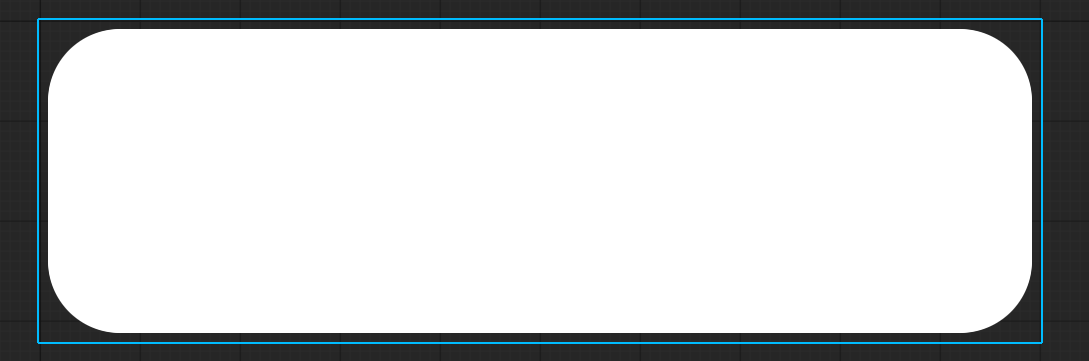
The circular material turns into a rounded box when 9-Sliced with a margin of 0.5